Mobile Setup
The mobile app is where alerts actually reach you. This guide covers install, connecting to your backend, and the notification permissions that decide whether a P1 wakes you up at 3 a.m. or waits silently until morning.
- An OpsPing responder or admin account. Stakeholders use Status and Settings and are not paged; they should skip the Alerts and P1 verification steps below.
- Your pairing QR, or your backend URL —
https://api.opsping.comfor cloud, or your team's trusted private deployment address. - An iOS or Android device. Push notifications require a physical device; simulators won't receive them.
-
Install the app
Install OpsPing on your phone from the store listing for your platform: App Store (iOS) or Google Play (Android).
Note — private deploymentsThe store app can connect to your team's private deployment using its trusted HTTPS backend URL or pairing QR. Your admin will tell you if the deployment requires a separately distributed build.
-
Pair the app or sign in
On a fresh install, tap Scan QR Code and scan the pairing code from web Settings → Mobile app. Pairing configures the backend and signs you in as the web user in one step. Alternatively, choose Sign in with email and enter the backend URL plus credentials.
Use pairing or SSO for an account protected by an MFA challenge; the current mobile email/password form does not complete the MFA challenge. Saving an API key in Advanced is not a substitute for a mobile user session.
To change or test an existing connection, open Settings → Advanced. Run test checks server reachability, not user authorization or push delivery.
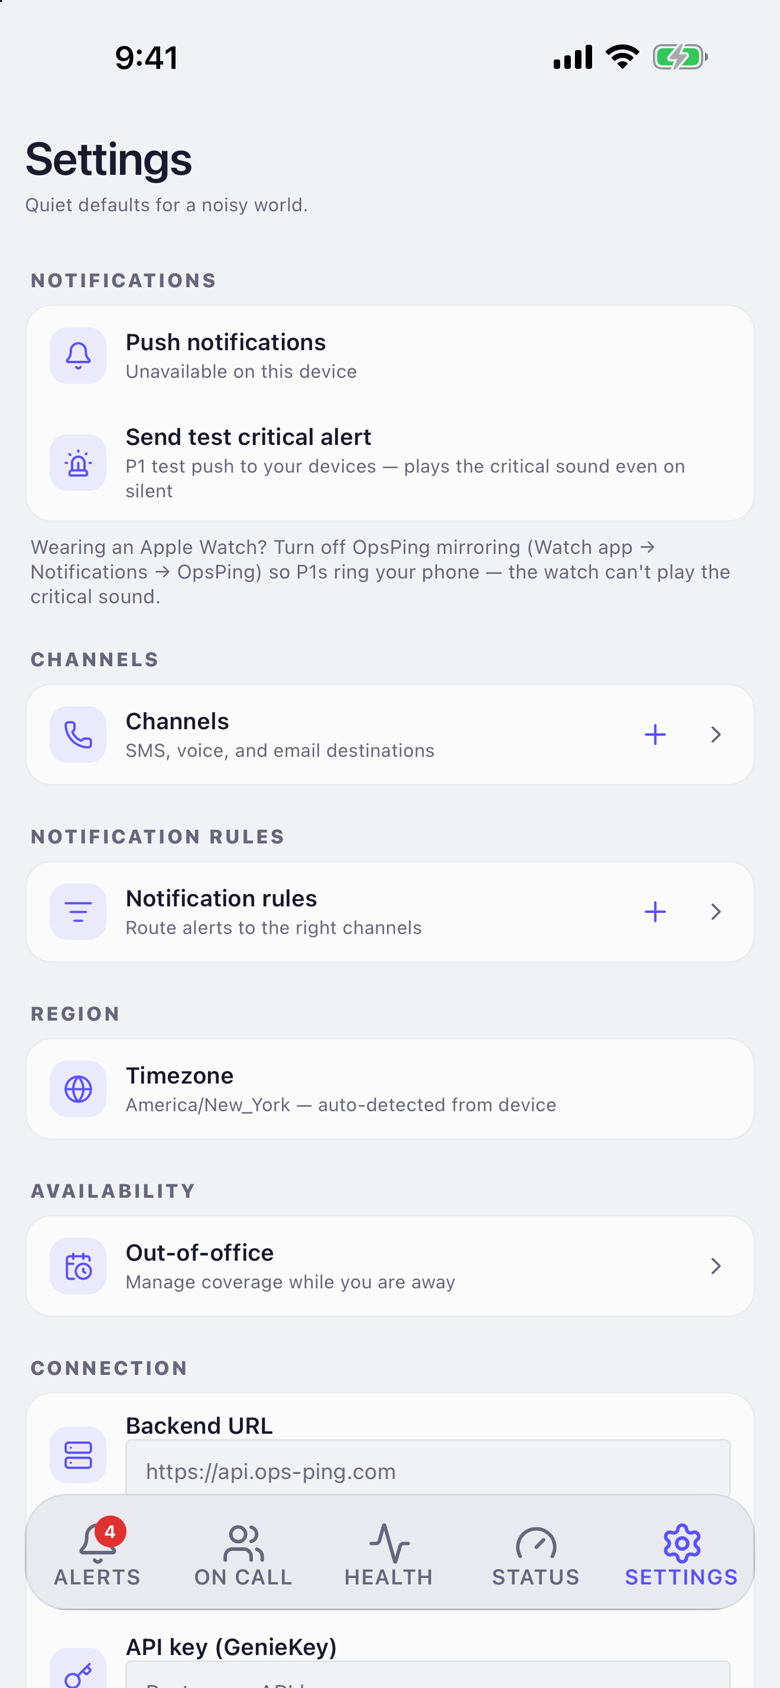
Advanced settings contains backend connection controls. Verify authorization by signing in, then verify paging from Delivery health. WarningIf Run test fails, check the URL and network path. Diagnose account authorization separately; a successful health probe does not mean the session or push token is valid.
-
Grant notification permission
The app prompts for push notification permission on first run. Accept it — declining means no pages, which defeats the purpose.
What the prompts meaniOS: the system dialog "OpsPing would like to send you notifications" gates all push. If you tapped Don't Allow, re-enable it in iOS Settings → Notifications → OpsPing.
Android 13+: the runtime notification permission works the same way. On some Android skins also check battery optimization — aggressive savers can delay or kill push delivery.
Android — force-stop and swiping away: do not use Force stop in system settings — a force-stopped app is put in Android's "stopped" state, and the system withholds push notifications, including P1 pages, until you manually open the app again. Swiping the app out of Recents is less consistent — stock Android doesn't always treat it as a force-stop, but aggressive OEM battery managers on many devices can still impair or block delivery. Leave OpsPing backgrounded (Home button, app switch) — that keeps pages flowing reliably.
-
Understand critical alerts
OpsPing marks P1 notifications as critical. On iOS, enable both Notifications and Critical Alerts. A delivered P1 can then request sound through Silent mode and Focus. If you wear an Apple Watch and need the iPhone itself to ring, turn off OpsPing mirroring in Watch → Notifications → OpsPing and test both devices. On Android, allow notifications and DND bypass for the P1 alarm path.
TipTo receive only P1 notifications, ask an admin to enable Users → Notify → P1 alerts only. Mobile Settings → Notifications manages device permission, test pages, and shift reminders. Disabling push or applying an account mute suppresses P1 too.
-
Check delivery health
Open Settings → Delivery health to check push permission, the critical alarm path, device-token registration, and the last health-check time. Use Send P1 test page to verify actual delivery; Last checked is not the time of the last received push.
NotePush is the primary delivery path. Voice calls can provide an urgent fallback, and email carries durable context; both are configured per user and require provider credentials on the backend. See Notifications & channels.
-
Verify the responder experience
Responders and admins can open Alerts to see the same alert lifecycle as the console. The on-call banner shows current schedule coverage. Stakeholder accounts intentionally have no Alerts tab.
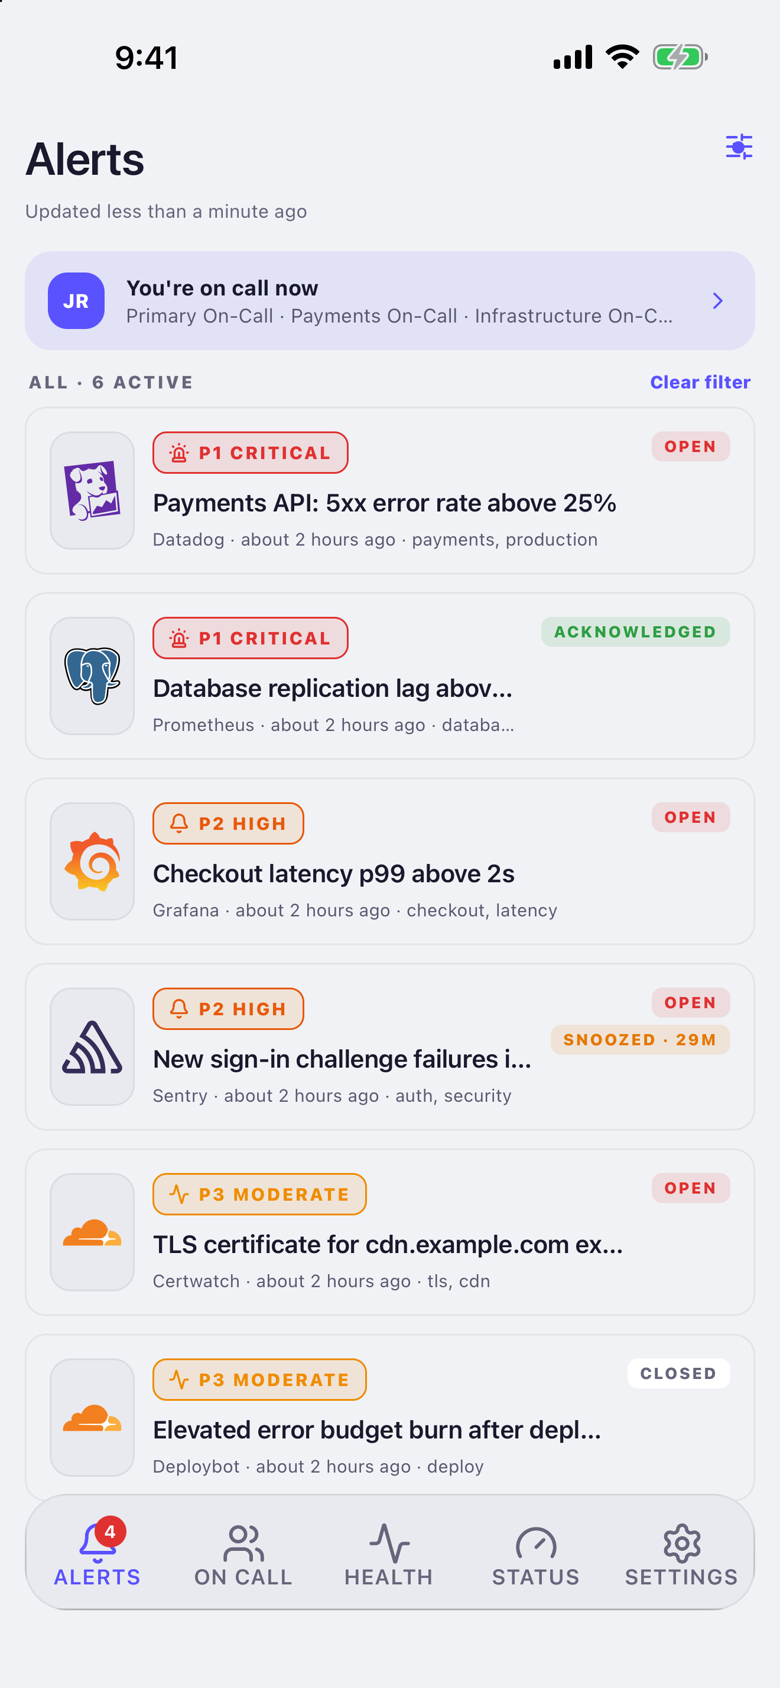
The responder Alerts tab combines current alerts, on-call context, and a Refine sheet for filters and grouping. Finally, open Settings → Notifications, send a P1 test page, and lock the physical phone during the countdown. Confirm the sound and presentation you expect on every device you rely on.
Going on call (Android)Keep OpsPing backgrounded, not force-stopped. Tapping Force stop blocks push — including P1 pages — until you manually relaunch the app, and swiping it away from Recents can have the same effect on devices with aggressive battery management. See FAQ for details.